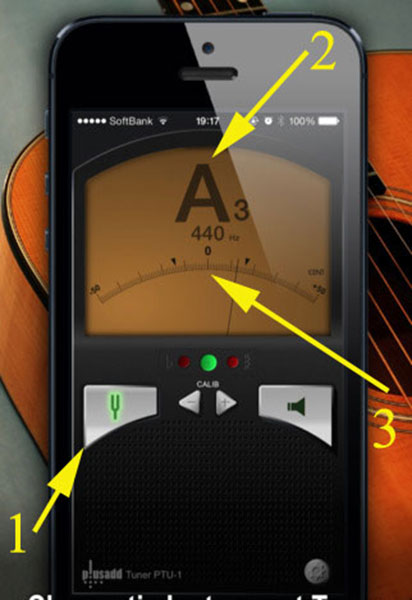
#1 points to the pitchfork icon, which puts the tuner in “read” mode.
#2 is where the note plucked is indicated (in this case, an A). By comparing this readout with your tuning card, you will know whether to make the note higher or lower.
From bottom to top, the Music Maker’s strings follow this sequence: G A B C D E F# (or, F sharp) G A B C D E F# (again) and G.
Thus, if the readout indicates an A, and you need a G…then you need to loosen the tuning pin.
Conversely, if the readout indicated a C, and you wanted an E or an F#, you would need to tighten the tuning pin.
#3 arrow indicates the pitch of that note in megahurtz. It’s where the fine tuning takes place.
Note the “O” below the note. This indicates perfect tune.
Also note the two triangles, one to each side of the “0” Everything to the left is a little (or a lot) flat. Everything to the right is a little (or a lot) sharp.
The space between the two triangles is where the needle should point.
Hitting the “0” is perfect pitch, but most people won’t be able to tell if it’s a little bit off. Anything outside of the two triangle range, however, should be adjusted.
Example: In the photo above note the position of the needle, which is to the right of the “0.” But it’s within the two triangles, which is good enough.
The only tricky bit is the F-sharp. A Music Maker lap harp has two. This is not an F where the needle lies outside the right triangle. That is just a sharp F…not an F sharp. (We realize this sounds somewhat odd, but that’s music for you.)
Keep tightening the tuning pin a little bit and you will see the F on the screen change to an F#, indicating a true F sharp. You should then adjust the tuning pin so that the needle on the tuner lies between the two triangles.
Enjoy!